Saw this case and thought that it is pretty cool looking.
It is the IN1 Multi-Tool Utility Case. The concept is neat, however, I'm not sure that it would actually come in handy that many times. The case includes: tweezers, toothpick, scissors, nail file, screwdrivers (Phillips & flat-head), and two small pens (red & blue).
The case is priced at $44.95. The size of the tools has me very optimistic, but I think it's a neat concept and would be cool to show off.
Friday, May 2, 2014
Creating a Microsoft Windows Server 2012 Virtual Machine in Virtual Box
Hello, this is a quick guide on getting a Windows Server 2012 virtual machine up and running in a quick amount of time. Many will find virtual machines great for testing purposes without risking the chance of messing up important settings or data.
To begin you will need:
A copy of Virtual Box from:
https://www.virtualbox.org/wiki/Downloads
A .ISO image of Microsoft Server 2012 Evaluation Edition from:
http://technet.microsoft.com/en-us/evalcenter/hh670538.aspx
Select Evaluation ISO from the drop down list. You will also be prompted to install a small download manager to handle downloading the .ISO.
Note: If you have a regular copy of Server 2012 you can make your own .ISO image using a tool such as PowerISO.
A machine with a decent amount of RAM and hard disk space.
For my example, I'm using a 64-bit Windows 7 machine and I'll be allocating around 2GB of RAM and 15GB of disk space. Use what you would prefer. More RAM will make things smoother and more disk space will only more storage.
Install Virtual Box and move the finished .ISO Server download to a location that you will remember.
Once Virtual Box is installed, open it and click new in the top right corner:
Once that is finished, you will see the screen below:
To begin you will need:
A copy of Virtual Box from:
https://www.virtualbox.org/wiki/Downloads
A .ISO image of Microsoft Server 2012 Evaluation Edition from:
http://technet.microsoft.com/en-us/evalcenter/hh670538.aspx
Select Evaluation ISO from the drop down list. You will also be prompted to install a small download manager to handle downloading the .ISO.
Note: If you have a regular copy of Server 2012 you can make your own .ISO image using a tool such as PowerISO.
A machine with a decent amount of RAM and hard disk space.
For my example, I'm using a 64-bit Windows 7 machine and I'll be allocating around 2GB of RAM and 15GB of disk space. Use what you would prefer. More RAM will make things smoother and more disk space will only more storage.
Install Virtual Box and move the finished .ISO Server download to a location that you will remember.
Once Virtual Box is installed, open it and click new in the top right corner:
This will bring up a menu to insert the name and type of Windows. I just chose Server 2012 and chose Other Windows 64-bit at the very bottom.
The next few options will allow you to pick RAM and HD amount. Refer to what I said above when deciding how much to use. I chose a 15GB VDI at this step.
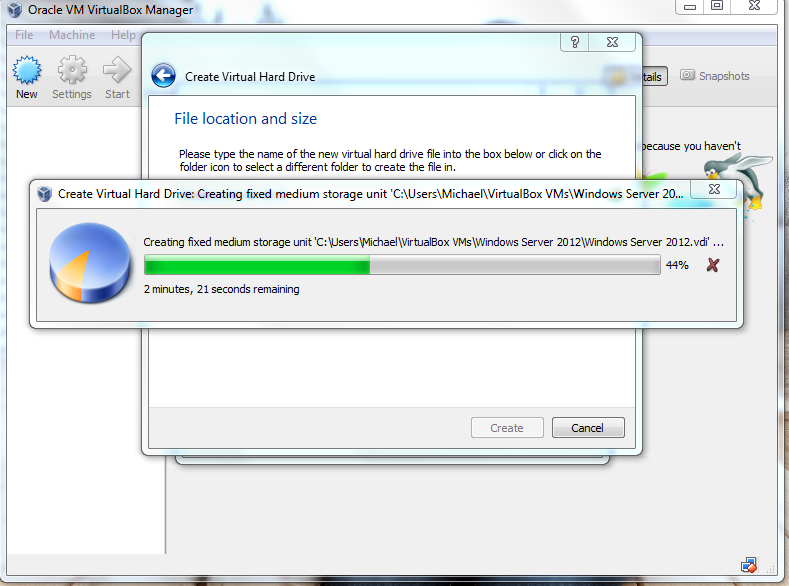
Once you have picked, it will begin to setup the virtual machine disk space:
Choose the green start arrow to start the VM. You will then get a screen asking you to point to your .ISO file that you downloaded from above:
Choose the location of it and hit start. The system will begin to boot up and you'll get prompted with:
You'll know go through the Server 2012 setup and install it. Choose the settings you would like and hit next. It will eventually start to install Server 2012:
Once it finishes, it will prompt you to enter a password and then you will be at this screen:
To log in, go to File > Insert Ctrl + Alt + Del. That will send the command to provide a login box. If you try to do it normally on your keyboard you will bring up your computer's task menu.
Note: I have read that some people have issues connecting their VM to their network. Under settings > General, make sure you set Version to: Windows 2008 32 or 64 depending on what you're using as there wasn't an option for Windows 2012. This may have changed by now.
Congratulations! You now have a Windows Server 2012 installation running within Virtual Box on your operating system. You can now enjoy tweaking out Server 2012 to your liking!
Thursday, May 1, 2014
Logging into a Windows 7 Machine Locally When Domain is Unavailable
Sometimes students have to log in locally at home from their devices. This can be troublesome when the domain is unavailable and they don't know the name of their computer.
Luckily, there is a fast remedy for this.
For this example, we will assume that username: bob is trying to log into a computer named: laptop001
This would give the local name of: laptop001\bob
We can log in quicker by using this method. To log in locally on a Windows 7 machine using the example credentials from above:
In the username box you would just type: .\bob
Then you would input the password as normal and log in.
This method uses a full stop to cut down on the amount of information that needs entered. This is good for people trying to log in that might not know the device name.
Subscribe to:
Posts (Atom)
